
It seems as though almost every artist working at TSR between 1980-81 contributed to some version of module B3 "Palace of the Silver Princess". Many pieces are unsigned, so I sometimes had to make my best guess as to who did what:
Darlene

Illustration by Darlene for the French version of module B3.
Darlene contributed three illustrations to the French version of module B3 "Le palais de la Princesse Argenta" (see this thread on Dragonsfoot, for more details).
Jeff Dee

A Protector confronts a warrior against the backdrop of a starry sky. Illustration by Jeff Dee
Dee contributed the color illustration appearing on the back cover of both versions of the module.
The Protectors are described as guardians of the tower level in the original version. They appear to each adventurer in a dream at the beginning of the adventure in Moldvay's version.
Jim Holloway

Vampire roses ensnare a luckless adventurer. Illustration attributed to Jim Holloway (unsigned).
Holloway was brought in to provide a number of new pieces for the revised version.
He contributed illustrations of warriors battling skeletons (RB3, pg. 7); adventurers lifting a portcullis (RB3, pg. 12); a group of kobolds (RB3, pg. 14); a skeleton (RB3, pg. 19); a cave locust (RB3, pg. 22); and vampire roses (RB3, pg. 32).
David S. La Force

The ghosts of Princess Argenta and her knight. Illustration attributed to David S. La Force (unsigned).
Update (Mar 14, 2023): Thanks to Lore Suto for identifying this illustration as the work of Diesel in a twitter post on Feb 5, 2023:
SDSIII gave me a great reply on this! The full page "Scarlet Witch" was by DSL. (He remembers him drawing it!) He's not sure whether it was his idea or DSL's to include the same party.
The original version (OB3, pg. 22) was modified to depict the pink pedestal with an amulet in the revised version (RB3, pg. 16), rendering the identities of the two depicted unclear
Erol Otus

Illustration of a mountain range, by Erol Otus. The buildings in the foreground are similar to others he illustrated (see this thread).
In addition to the front cover illustration (color) of the Decapus, Otus also contributed a small illustration of a mountain range (OB3/RB3, pg. 4); and a full-page illustration depicting Wells' uboes as hermaphrodites (OB3, pg. 19).*
*Wells had not conceived of these three-headed creatures as hermaphrodites, and objected to the illustration, but was told that it was too late to change it

Candella and Duchess. Illustration attributed to Harry Quinn (alternately attributed to Jim Roslof).
Like Holloway, Quinn contributed several pieces to the revised version. Although most are unsigned, I believe these include the silhouette of the palace (RB3, pg. 2); the skeleton (RB3, pg. 11); the bear (RB3, pg. 13); the blocked exit (RB3, pg. 17; signed); the barracks (RB3, pg. 20; signed); Candella and Duchess (RB3, pg. 24);* and the throne room (RB3, pg. 29).
*the subject of multiple homages by Domenico Neziti (here, here, here, here, here, here, here, here, here, here, here, here, here, here, here, and here)
Jim Roslof

Lamdomon, the tinker, and his daughter, Zappora, prepare their wagon for departure. Illustration by Jim Roslof.
Jim Roslof was the art director at the time, having taken over from David S. Sutherland III.
He contributed "The Tinker and His Wagon" (OB3, pg. 6); and illustrations of the cave bear cub (OB3, pg. 11); and contents of the game table in room 31 (OB3, pg. 25/RB3, pg. 21).
Roslof may have also done the illustration of the giant rat in the revised version (RB3, pg. 9).
Laura Roslof
Catharandamus the cleric and his followers in the original (above) and revised (below) versions of module B3 "Palace of the Silver Princess". Illustrations by Laura Roslof.
Laura Roslof was Jim Roslof's wife. She contributed "The Illusion of the Decapus" (OB3, pg. 10); and illustrations of the palace garden (OB3, pg. 20/RB3, pg. 26); and Catharandamus (OB3, pg. 24/RB3, pg. 27).*
*the latter two illustrations were significantly altered for the revised version
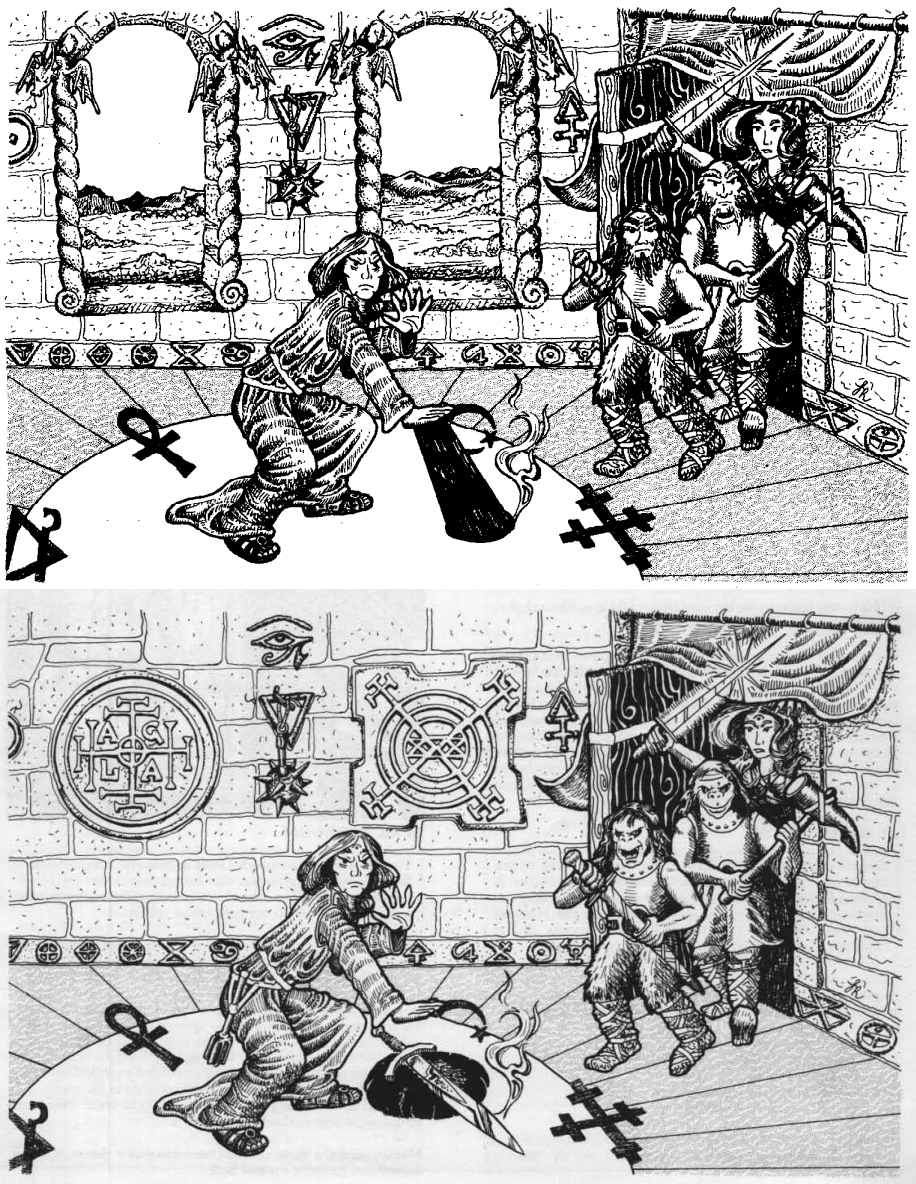
Stephen D. Sullivan
Sullivan contributed several illustrations depicting the same three or four adventurers (a white male fighter, a black male fighter, and a white female fighter in the original, and a white female magic-user in the revised version).

"You meet in a tavern." Illustration by Stephen D. Sullivan (his initials are difficult to spot - can you find them?)
The group appears in a tavern (OB3, pg. 7); entering the dungeon (RB3, pg. 8); triggering the pit trap (OB3, pg. 13/RB3, pg. 18); examining the pink pedestal (RB3, pg. 15; a cropped and altered version of the illustration from OB3, pg. 21); encountering the dueling swords (OB3, pg. 17); finding Argenta's portrait (OB3, pg. 18/RB3, pg. 28; cropped on the right in the revised version); approaching the pedestal protected by the ghosts of Argenta and her knight (OB3, pg. 21); and fighting a werewolf (RB3, pg. 28; the female magic-user looks a bit like the Scarlet Witch).

Illustration of a Diger, by Stephen D. Sullivan (initials are once again difficult to spot).
Sullivan also contributed illustrations of the archer bush (OB3, pg. 26); baric (OB3, pg. 26); diger (OB3, pg. 27); and giant marmoset monkey (OB3, pg. 28).
Finally, Sullivan collaborated with Wells on the illustration of the mysterious knight and his dragon steed (OB3, pg. 3/RB3, pg. 5); and Travis entering the torture chamber from behind the party (OB3, pg. 15).
Jean Wells

The mysterious knight and his dragon steed. Illustration by Jean Wells and Stephen D. Sullivan.
In addition to collaborating on two illustrations with Sullivan (mentioned above), Wells also created the map of the surrounding lands (OB3, pg. 5).
Bill Willingham

Room with poltergeist. Illustration by Bill Willingham.
Willingham contributed the frontispiece of a female centaur pointing towards the palace ruins (OB3/RB3, pg. 1); and an illustration of the room containing a poltergeist (OB3, pg. 23).


No comments:
Post a Comment